Project Financials
Installation & Configuration
Module Requirements
A number of standard NetSuite modules are required in order to successfully install FullClarity Storage. These NetSuite settings are available by selecting “Setup”, “Company”, “Enable Features”.
In addition to the NetSuite features, the FullClarity Portal SuiteApp must be installed prior to the FullClarity Storage SuiteApp. For more information about installing and configuring the FullClarity Portal, please see Portal Utility App.
Initial Data Requirements
Having installed the SuiteApp, a number of data items need to be populated in order for the system to operate. They should be created in the following order.
- Billing Stages
- Cost Centers
- Default Sales Items
- Configuration Records
Configuration Records
A configuration record is required in order for the Project Financials SuiteApp to function. If there are multiple subsidiaries, each subsidiary must have a configuration record.
To create a configuration record, select FullClarity > Priject Financials > Configuration to see the list of existing configuration records. Click the "New" button to create a new record, and complete the information as required.
Configuration Fields
| Field | Description |
|---|---|
| Subsidiary | Select the subsidiary that the configuration record relates to. If there is only 1 subsidiary, just select "Parent" |
| Default Quote Email Template | The template used to inform vendors that a quotation is requested |
| Markup Percent | The default markup percentage applied to all projects |
| Default Billing Type | The default billing type populated during the automated project creation process |
Defining Permissions
Prevent Access
To prevent all access to the Project Financials functionality, ensure that no permissions are granted to any of the FC Proj Fin custom records.
Administrator Access
In addition to having access to the project record, the following permissions are required:
| Group | Item | Permission Value | Notes |
|---|---|---|---|
| Lists | Customer | Full | |
| Lists | Items | Full | |
| Lists | Terms | Full | |
| Lists | Employee | Full | |
| Transaction | Invoice | Full | |
| Transaction | Find Transaction | Full | |
| Setup | Custom Segments | Full | |
| Setup | Custom Lists | Full | |
| Custom Record | FC Proj Fin Allowance Type | Full | |
| Custom Record | FC Proj Fin Billing Stage | Full | |
| Custom Record | FC Proj Fin Configuration | Full | |
| Custom Record | FC Proj Fin Contract | Full | |
| Custom Record | FC Proj Fin Cost Centre | Full | |
| Custom Record | FC Proj Fin Estimate | Full | |
| Custom Record | FC Proj Fin Estimate Collection | Full | |
| Custom Record | FC Proj Fin Estimate Expenses | Full | |
| Custom Record | FC Proj Fin Estimate Items | Full | |
| Custom Record | FC Proj Fin Field PO | Full | |
| Custom Record | FC Proj Fin Information | Full | |
| Custom Record | FC Proj Fin Quote Expenses | Full | |
| Custom Record | FC Proj Fin Quotes | Full | |
| Custom Record | FC Proj Fin WP Location | Full | |
| Custom Record | FC Proj Fin Warranty Insurer | Full |
View Only Access for Users
In addition to having access to the project record, the following permissions are required:
| Group | Item | Permission Value | Notes |
|---|---|---|---|
| Lists | Customer | View | |
| Lists | Items | View | |
| Lists | Terms | View | |
| Lists | Employee | View | |
| Transaction | Invoice | View | |
| Transaction | Find Transaction | View | |
| Setup | Custom Segments | View | |
| Setup | Custom Lists | View | |
| Custom Record | FC Proj Fin Allowance Type | View | |
| Custom Record | FC Proj Fin Billing Stage | View | |
| Custom Record | FC Proj Fin Configuration | View | |
| Custom Record | FC Proj Fin Contract | View | |
| Custom Record | FC Proj Fin Cost Centre | View | |
| Custom Record | FC Proj Fin Estimate | View | |
| Custom Record | FC Proj Fin Estimate Collection | View | |
| Custom Record | FC Proj Fin Estimate Expenses | View | |
| Custom Record | FC Proj Fin Estimate Items | View | |
| Custom Record | FC Proj Fin Field PO | View | |
| Custom Record | FC Proj Fin Information | View | |
| Custom Record | FC Proj Fin Quote Expenses | View | |
| Custom Record | FC Proj Fin Quotes | View | |
| Custom Record | FC Proj Fin WP Location | View | |
| Custom Record | FC Proj Fin Warranty Insurer | View |
Read and Write Access for Users
In addition to having access to the project record, the following permissions are required:
| Group | Item | Permission Value | Notes |
|---|---|---|---|
| Lists | Customer | View | |
| Lists | Items | View | |
| Lists | Terms | View | |
| Lists | Employee | View | |
| Transaction | Invoice | View | |
| Transaction | Find Transaction | View | |
| Setup | Custom Segments | View | |
| Setup | Custom Lists | View | |
| Custom Record | FC Proj Fin Allowance Type | View | |
| Custom Record | FC Proj Fin Billing Stage | View | |
| Custom Record | FC Proj Fin Configuration | View | |
| Custom Record | FC Proj Fin Contract | Create | |
| Custom Record | FC Proj Fin Cost Centre | View | |
| Custom Record | FC Proj Fin Estimate | Create | |
| Custom Record | FC Proj Fin Estimate Collection | Create | |
| Custom Record | FC Proj Fin Estimate Expenses | Create | |
| Custom Record | FC Proj Fin Estimate Items | Create | |
| Custom Record | FC Proj Fin Field PO | Create | |
| Custom Record | FC Proj Fin Information | View | |
| Custom Record | FC Proj Fin Quote Expenses | Create | |
| Custom Record | FC Proj Fin Quotes | Create | |
| Custom Record | FC Proj Fin WP Location | View | |
| Custom Record | FC Proj Fin Warranty Insurer | Create |
Project Billing
Projects can be billed to customers using the following formats:
- Milestone Billing
- Progress Billing
Milestone Billing
The Milestone billing method uses agreed events to trigger the requirement for an invoice to be created. These events are generally established as part of the contract process, and as such are known toward the beginning of a contract.
Billing Stages
Where a project is billed using the milestone billing method, a master set of billing stages should be populated. Any billing stage nominated as a default stage will automatically be added to a project as it is being created.
Create or Edit Billing Stages
To create or edit a billing stage, select FullClarity > Project Financials > Manage Stages. Create a new stage, or edit an existing stage from the list. Selecting a stage as a "Default Stage" will allow that stage to be automatically populated to a project during the project creation process.
Importing Billing Stages
Billing stages can be imported using the standard CSV Import function within NetSuite. A template containing a standard set of stages can be downloaded here: Billing-Stages-Import-Template.xlsx
Cost Centers
Cost Centers, also known as construction phases, cost codes, account codes and work codes, allow the construction costs to be reported on in logical groupings.
Create or Edit Cost Centers
To create or edit a cost center, select FullClarity > Project Financials > Manage Cost Centers. Switch to the Cost Center set you want to maintain, or click the "+" button to add one.
Using the worksheet controls, add a new row to the worksheet. Rows can be indented to become child rows by clicking the indent control button, or by dragging and dropping the row with the mouse. To edit a cost center, simply double click the name field and make your changes.
Importing Cost centers
Cost Centers can be imported using the standard CSV Import function with NetSuite. A template containing a standard set of cost centers can be downloaded here : Cost-Centers-Import-Template.xlsx
Project Records
The majority of the FullClarity functionality is encapsulated within a NetSuite Project record.
Creating a Project Record
To easily creat a project record in NetSuite, select FullClarity, Project Financials, Create Project. A screen will appear that is pre-populated with a set of default values defined in the configuration, and containing the set of fields required to allow the entire tree of records to be created. If the project is to be created under a new customer, ensure that the "Existing Customer" checkbox is unchecked, and complete the relevant details for the curstomer record. If the project is to be created for an existing customer, the "Existing Customer" checkbox should be checked and the customer selected.
If the configuration is set to create NetSuite Opportunity records at the same time as the project, then ensure that all fields relating to the opportunity are also completed. This will result in a set of records being created with the customer being the parent record, the project being the child record, and an opportunity being the grand child record (i.e. a child of the project).
WP Location
The WP Location (Work Package Location) allows the user to segment the site into locical work packages. These work packages can then be allocated against estimating and costing data (see below).
To enter WP Location values, edit the project and select the WP Location subtab under the Configuration tab. Add WP location entries to the list. When completed, simply save the project.
Project Configuration
The Project Configuration tab contains various fields relating to certain project defaults, including the default margin %, default billing type, retainage balances etc. These configuration options will generally be set with a default value based on the system configuration, but should be checked to ensure they match the requirements of the specific project.
Cost Estimating
Cost estimate records are used to establish what a project is expected to cost, and to assist in identifying the sale price for a project. Once a project has been contracted, the cost estimate becomes the budget for the project, and is referenced in all project budget reporting.
Estimate Components and Estimate Collections
Cost estimate data can be created either in a single record or in multiple records. When using multiple records (i.e. components), various components can be combined into a collection, with individual components being able to be included in multiple collections. This allows individual components to be re-used when costing different scenarios without the need for duplicating the individual component.
Creating a Blank Cost Estimate
To create a cost estimate, select the "Estimating" tab and click "Create Estimate". A popup box will appear:
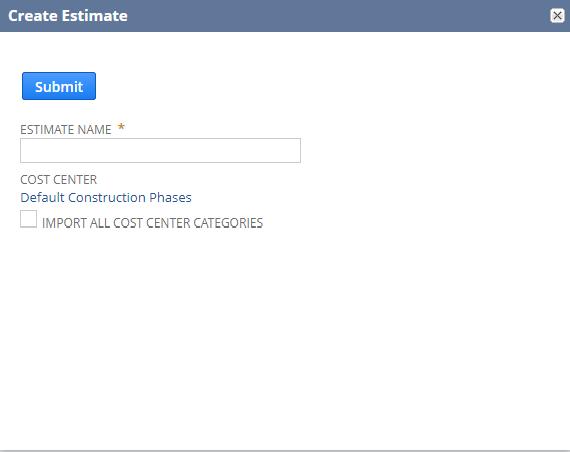
Enter the name of the estimate record. If you'd like all of the cost center categories to be populated into the empty cost estimate, check the "Import All Cost Center Categories" box. Click "submit" and a new blank cost estimate will be created.
Creating a Cost Estimate from a Template or Other Project
To create a new cost estimate from an existing template, select the "Estimating" tab and click "Import Estimate". A popup box will appear:

Select the templated cost estimate from the list. Enter a name for the estimate, and choose the relevant options - to either follow the template settings, to mark all items as applied, or to leave all items unapplied. Click "submit" and the new cost estimate will be created.
The same process is used to create a cost estimate from another project: instead of selecting the cost estimate, select the project and select the relevant cost estimate within the project.
Cost Estimate Templates
Cost estimates can be templated within NetSuite to enable an easy starting point for costing a project. Estimate Templates can be found via FullClarity, Project Financials, Estimate Templates.
To create a new estimate template, click the "New FC Proj Fin Estimate" button.
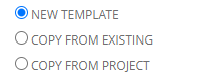
Choose whether to create a template from a blank page, or to copy an existing estimate from another template (existing) or another project. Having selected the relevant source option, complete the form and select "submit" to save the template.
Having created the template, it can be entered and edited just like any other cost estimate.
Cost Estimate Available Fields
| Field Name | Description |
|---|---|
| Category | This is the cost category / construction phase for the line. Multiple line items can be entered under a cost category. |
| Stage | The billing stage. This list comes from the billing stages configured on the project. Only relevant when Stage Billing is selected for the project |
| Allowance Type | This can be used to further categorise the line item into (for example) prime cost or provisional sum |
| Item Name | This is the item selected from the item master. Items are added to the cost estimate line by line to build up the total cost |
| Description | Populated automatically from the item record, this is the description related to the item. This can be edited on the cost estimate worksheet. |
| Unit | Populated automatically from the item record, this represents the unit that the item is measured in. |
| Quantity | The quantity of the item required in this project. This will be multiplied by the item rate to produce a cost. |
| Rate | Populated automatically from the item record, this is multiplied by the quantity to produce a cost |
| Amt | This is the result of quantity multiplied by rate |
| Contingency % | Defaults to zero, this provides allowance for a contingency % to be included in the cost estimate at a line level. |
| Contingency $ | This is the $ representation of the contingency. Calculated as Amt multiplied by Contingency % |
| Cost $ | This is the contingency inclusive cost rate, calculated as Amt plus Contingency $ |
| Margin % | This defaults to the Margin amount set in the project configuration, but can be changed on a line by line basis. |
| Margin $ | This is the $ representation of the margin, which adds to the Cost $ to produce a Net $ amount. |
| Net $ | The net of cost plus margin. Example: if the Cost $ is $75 and the Margin % is 25%, the Margin $ will be $25 and the Net $ will be $100. $25 = 25% of $100. |
| WP Location | Select the Work Package Location (see above). This can be left blank. |
| Applied | If unchecked, this line will not be included in the totals |
| Notes | Free form notes for general use |
| Quote | Where the bid request process has been used to obtain supplier quotes or bids, the quote or bid number will be listed here |
| Supplier | Where the bid request process has been used to obtain supplier quotes or bids, the supplier / vendor will be listed here |
| Purchase Order | Any purchase order for this item will be listed here as a link |
Adding a Cost Estimate Line
To add a cost item to the cost estimate, right click on the cost estimate and select "Add New Line". A popup box will appear requesting data about the line to be added:
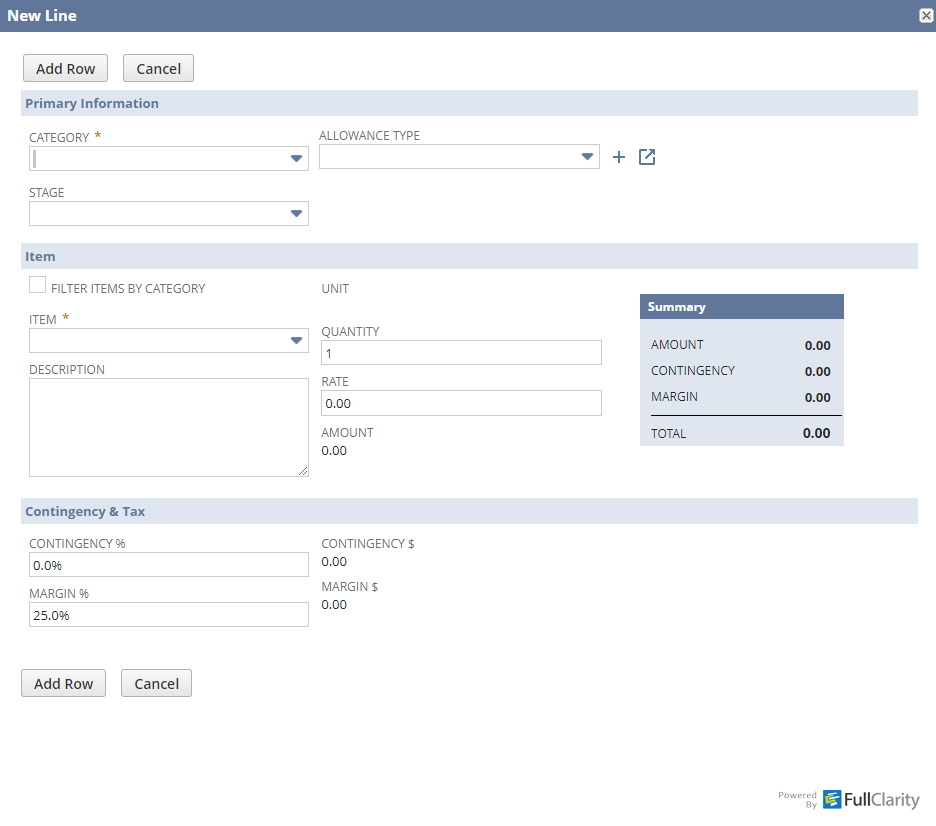
This is a customisable form, and so can may appear differently in your system. However the fields "Category" and "Item" must always be present and must be populated.
Select the category from the drop-down list. All items in the estimating must be selected under a category. If the "Filter Items by Category" checkbox is ticked, the options available in the "Items" select list will be filtered to only those items that have previously been used in that category. If it is unchecked, all items will be available.
Having selected an item, the various fields will auto populate, including description and rate. These can then be manually altered depending on the requirements of the cost estimate.
Set the quantity so that the cost amount can be calucated.
When all needed fields have been populated, click "Add Row" and the line item will be added to the cost estimate.
Adding Multiple Cost Estimate Lines
Multiple lines can be added to a cost estimate at a time. To do this, right click on the cost estimate under a specific category, and select "Add Multiple". A popup will appear as follows:
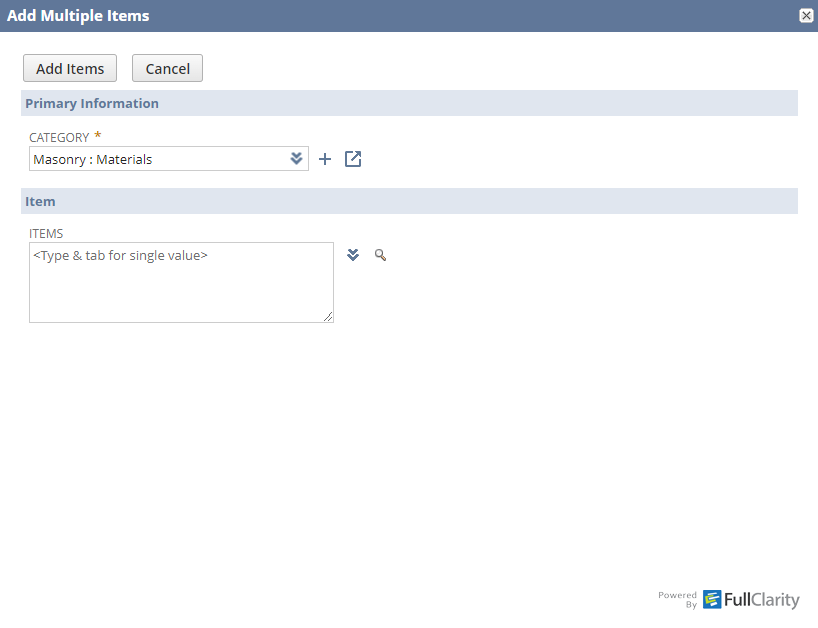
The category is already selected based on where your mouse was on the cost estimate sheet when you selected Add Multiple, however this can be changed to any other value.
Select the chevron next to the "Items" list, and make 1 or more selections from the items presented.
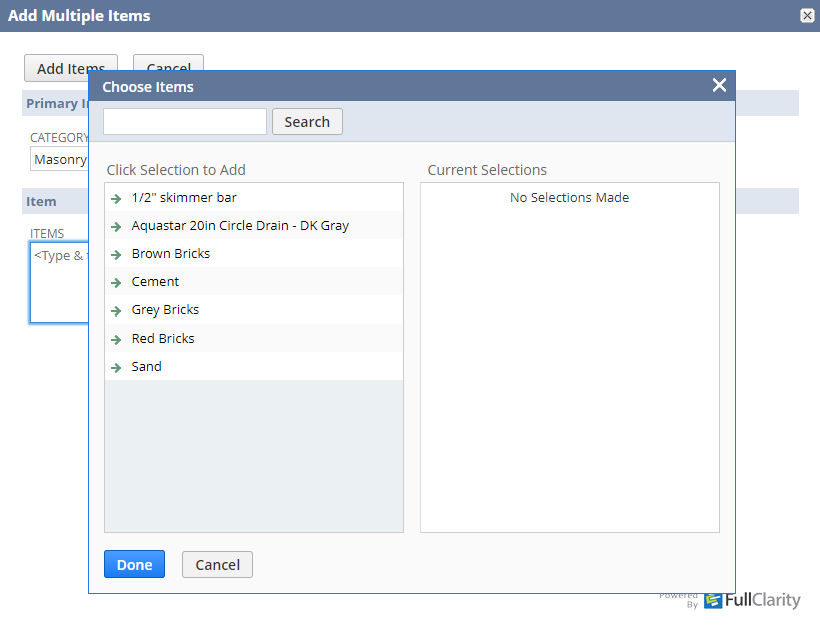
Warning
For items to appear in the multi item select popup, they must already be linked to the cost category record. This link is created automatically when an item is used for a category on any cost estimate, but it can also be created manually by editing the item, and adding the category in the "Category" multi select field.
Creating an Estimate Collection
Cost Estimates can be grouped into different Cost Estimate Collections to enable different cost options to be explored.
To create a Cost Estimate Collection, select the Estimating tab then the Estimate Collection sub tab. Click "Create Estimate Collection" and the following popup will appear:
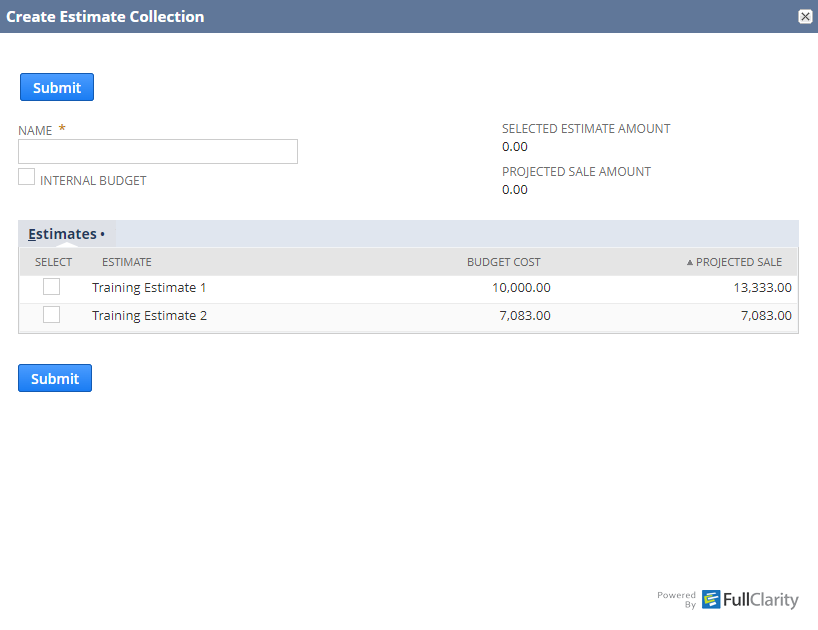
Give the collection a name, so that it can be differentiated from other collections.
From the list of available estimates, select 1 or more estimates to be included in this collection, and click "Submit".
Note - collections can be created before the cost estimates themselves have been completed. This allows the user to group together different cost estimates that are being worked on, and to monitor the costs in each collection as the component estimates are populated.